Wednesday, March 18, 2015

Teepee Tutorial with Stow-Away Bag


Ever since I pinned this teepee, I was dying to make one for my own baby girl. It is just about the cutest thing, perfect for all ages, indoors and outdoors and totally storable. It doesn't sing any annoying songs or run out of batteries, and its completely customizable to the look you want... this "toy" is a total slam dunk in my book. I couldn't find an online tutorial that had exactly what I wanted, so I went a little free form with this project and I'm so happy with how it turned out. I used my sewing machine for most of this, but you can easily complete the project without a single stitch- I've included some modified instructions for my non-sewers. So, without further ado, my teepee tutorial! Here's what you'll need:

Materials:

7 yards of fabric (I used 2.5 yards each of 2 fabrics, and 2 yards of a third fabric)
1.5-2 yards of ribbon
4 10-foot lengths of PVC pipe
6 PVC pipe end caps
12 PVC pipe couplers
Thread matching your fabric
Spray paint (optional)
If you're not sewing, you'll also need heat bond glue strips.

Tools:

Electric or hand saw to cut PVC
Drill with 3/8 bit or larger
Sewing Machine
Scissors
Chalk or other utensil for marking
Glue Gun and glue
If you're not sewing, you'll also need an iron.

Method:

First, wash and iron your fabric. This is a little time consuming but oh so worth it, so you know the fabric won't shrink and pull away from the seams after future washes. Next lay the fabric out flat and prepare to cut.
Measure 69" along one long side of the fabric, and mark with chalk. Keeping one side of the measuring tape stationary, swing the other end toward the opposite side of the fabric, marking along the arc as you go, and then connect that point with the original corner, marking as you go. Then just cut out the panel. Here's a diagram to make that a little more clear:


Sorry for the quality,  but you get the idea, right? There's not an exact science to the angle of the panels, but its a good idea to mark out both panels on the fabric before you start cutting, so you know they fit. Once you cut out your first pieces, use them as a template to cut your next 4 panels without having to measure. On 2 yards of fabric, the panels should fit together like this:

Again, fabulous diagram job, I know- but it gets the job done! Once all 6 of your panels are cut, choose one panel to be the "door", and cut it in half vertically to form two mini panels. Then, pin them all together and sew (or use your heat bond glue, non-sewers!) the panels points-ends together into a half circle with the half panels on the ends, like this:


The more carefully you cut out and line up the pieces, the better your teepee will turn out so take your time here! I found it helpful to connect half of the pieces, then the other half, and then join the two halves so I wasn't dealing with so much fabric in my machine at once. Once your pieces are all connected, hem the raw edges of the two half-panels. Then begin hemming the bottom. Fold up about 1.5" of fabric for the hem and begin sewing around the teepee's bottom, leaving 2" spaces in the hem where each panel connects to the next. These little gaps will form pockets for your PVC end caps to sit in, like this: 


Once your hem is complete, glue one PVC end cap into each of the gaps in your hem, the pockets you created. Trim away any extra fabric that might get in the way when inserting your PVC pipes.

The last step to complete the fabric cover is to create the hole at the top for the poles. At the center of your half-circle, mark 3" from the center all around, and cut out this small half-moon of fabric. Fold down the raw edge and hem securely, so you're left with this shape:


Once your cutout is hemmed, simply connect (sew or glue, whatever!) the entry panels 1.5' down from the center, making your half circle into a cone shape. Fixing the top closed this way will help everything hold together once the teepee is standing. If you like, feel free to add ribbons to the entry panels about 3/4 of the way down to serve as a closure. You need about 1' of ribbon on each side if you want to do this. I did, and I think it looks nice although Felicity finds it really confusing ;)


Next we start on the structure of the teepee- the poles themselves. Cut your PVC pipe into 2' sections. You'll end up with 20 lengths of pipe, and you only need 18 for this project. Again, accuracy matters here: the more carefully you measure and cut, the easier it will be to put up your teepee in the end and the better it will look when set up. I'm the queen of rushing and cutting corners so take my word here- slow down and do it right! You'll be glad you did.

Choose 6 of the poles to be your top ends, then measure and mark 10" from one end. On each mark, drill a hole all the way through each pole. You'll be threading your ribbon through these holes, so choose an appropriate size drill bit for this, and brush away any plastic shavings after you drill.

If you want to spray pain your poles, this is the time to do it. Be aware that the paint does scratch off of the PVC rather easily, and can make the assembly and takedown of the teepee kind-of difficult due to the stickiness and slightly increased width of the poles. We opted to paint only the top sections since only those really show and I'm very happy with how that looks. You can see the bare poles in the interior of the teepee, though, so if that bothers you, painting might be the way to go.


You are nearing the finish line! The last thing to do is just put it all together. The easiest way I found to do it was this:
1) Connect the poles - 3 lengths of PVC each, and make sure one of the lengths with a hole drilled is on the end of each of your 6 poles.

2) Thread the ribbon through the holes connecting all 6 poles and tie loosely, wrapping around all the poles several times where the holes are drilled.

3) Slide the fabric teepee cover over the bundle of poles.

4) Insert the ends of the poles into the PVC caps which are glued into the cover's bottom hem. Make sure to do this in an order that makes sense, as in, the poles are tied together in a circle at the other end so mixing them up at the bottom makes it really awkward and tough to put up.

5) Stand your teepee up and spread out the legs. It can be helpful to have a second person to hold the teepee cover up and in place while you do this. Once you're happy with the set-up, wrap the top ribbon tightly around the fulcrum (where all the poles converge at the top) to secure the poles. 

The Matching Bag:

For me, the bag is what puts this project over the top as an awesome must-do. Lets be honest, the teepee is kinda huge when set up and I love being able to easily store it away in a cute bag that fits on a closet shelf. For your bag, simply take 1 yard of fabric (or 2 half yards of fabric, as I did) and fold outside-in (pretty pattern sides against eachother) and sew to connect on 3 sides, leaving one short side open. Hem the raw edges of the short side and turn the bag rightside out. Attach a length of ribbon by its center to one side of the bag, about 3" from the top. This will serve as your closure for the bag.


That's it! I am seriously LOVING having this in the house. Felicity crawls in and out of it all day long and the cats do too. Its such a fun, ageless toy that I know she'll enjoy for years. I even made another one for my niece Nora's birthday, and she is loving hers too!


Isn't my niece just about the sweetest thing on two legs!? I was able to ship this gift to her all the way to Oklahoma in a flat rate shipping box since the teepee can be packed away into such a compact space! LOVE IT! :)

Anyway, I hope you have all enjoyed this project and please feel free to message me on Facebook or comment on the blog here with any questions or to troubleshoot! Please send me pictures of your project if you decide to make a teepee for your little one! Thanks for reading... If you need me, I'll be in my teepee ;)


xo Allison

Monday, March 16, 2015

Felicity's First Birthday

Long time no see! I haven't posted here in several months and I've missed it. Not much is new in our lives- we switched to cloth diapers, and Felicity turned one! We had a fabulous time at her party this past Saturday, and I wanted to share some photos of the day with you.

Since Felicity's birthday is 3.14, "Pi Day", I wanted to incorporate pies into the theme, and what we ended up with was a Pi Day Picnic theme.


We are sandwiches and traditional summer sides like watermelon, and potato salad, and drank lemonade and iced tea from Mason jars. I even found some cute red and white paper straws at Joann Fabrics!


Those jars of candy were a "guess how many" game and the person who guessed closest got to take home the candy. The kids especially loved it!


I made Felicity's outfit for the party (pre-cake smash!) and I was so happy with how it turned out! She had a little red circle skirt, a "1" onesie and matching headband. She even left the headband on most of the time! I was so impressed :)


Some friends were kind enough to lend us their cornhole (beanbag toss, for you non Michiganders) to play at the party. It was a neat way to bring the picnic atmosphere inside on a chilly pre-spring day!


For the decorations, I kept it really simple with red gingham bunting banners. I made these using my new sewing machine, it was super easy!


A couple of the banners had phrases, and others were just plain red and white. I clipped photos of Felicity throughout the year to each flag on the plain red banners. It was so fun to look at each one and see how much she has grown and changed!


Being a first birthday of course, there was a cake smash! Felicity inherited my sweet tooth and was only too happy to dig into her cupcake from Sugar High Bakery in Frankenmuth!


Last but not least, I was thrilled to finally be able to give Felicity the gift I've been working on for months, her reading teepee! She had a blast playing in it with all the kids.


I'll be posting a tutorial with all the steps to make your own later this week. It all folds up into a matching storage bag for easy clean-up. I think you're going to love it!

Happy First Birthday to my sweet girl :) this year has been a blur of sleepless nights, giggles, worry, and pure joy. It is a pleasure to be your mommy!

Thanks for reading :)

Xo Allison


Saturday, January 3, 2015

Resolved in 2015: The Year of Intention

I love New Years. There is something so romantic about the idea of a completely fresh start, a blank page, a clean slate. We all need that once in a while, don't we? One of my favorite quotes from Anne of Green Gables reads:

“Isn't it nice to think that tomorrow is a new day 

with no mistakes in it yet?”

Some people don't like the idea of resolutions, but I have always enjoyed them! Even if it is just a fleeting motivation, some effort toward self improvement is better than none at all. I thought I would share mine with you guys!


In 2015, I am resolved to be intentional.

My plan is both simple and encompassing. I want to be mindful. I want to stop doing things out of fear, laziness, or habit, and instead make conscious choices that will better my life as a whole.

In Parenting... 

I want to consider my relationship with my child. How do I want her to feel about me? Remember me? Talk about me? What do I want her to learn from me? If she mirrored my behavior, would I be proud?

I want her to see me as human. I want to be patient, kind, understanding and forgiving. I want to apologize when I'm wrong and when I fail. I want her to learn to love herself, inside and out, for all her imperfections. I want to spend time with my daughter each day, not just in her presence, mindlessly scrolling through Facebook. I want her to see in me a woman who loves her Lord and loves herself and others, because God has made them lovely. 


In Spending...

In my time and money, I want to have clear priorities. There is a limited amount of each, and I don't want to be wasteful or impulsive. That's not to say there can't be treats or time to relax, but I want to choose them purposefully. Will this half hour of TV make me richer for the experience, or have I already seen this episode of "Say Yes to the Dress" 10 times? Will this new sweater really improve my life, or do I already have 4 ivory cardigans? Is there a better choice for this scarce resource? I want to be thrifty, not penny-pinching, and wisely invest that which I've been given. 

In Caring for My Body...

Nutrition and exercise are a constant struggle for me, so I want to be specifically mindful of my choices here. Am I really hungry, or am I just thirsty, or maybe even just bored? Am I really too tired/busy/sore to work out or am I just making excuses? I want to make food and exercise choices that will move me toward my goals, not away from them. I want to eat smart portions of food, skip junky options in favor of healthy ones. I want to strengthen my body and use it for all the amazing things it can do. I want to cook healthy meals for my family. I want to take my vitamins, drink enough water, and eat more fruits and veggies.

In My Speech...

When things go wrong, I don't want to explode with nasty words. I don't want to be that girl. I hope to be mindful in my reactions, thoughtful of others' feelings. This applies hugely in parenting but also in all my other relationships. I saw this amazing post from The Hands Free Mama and it really spoke to me. I want to say things that are healing, not harmful. I want to find positive ways to express myself, and I want to practice not saying things that would do more bad than good.


In My Marriage...

I love my husband more than words can say but let me be honest... marriage is hard! It is so difficult finding time to connect between work, keeping up the house, masters classes, evening and weekend events, travel, the list goes on.  I want to talk to my husband, like really talk, about something other than "when was the last time her diaper was changed" and "hey babe could you take out the trash?". I want to laugh together! I want to dedicate time together without phones or TV to just date, just be together, just enjoy being in love.


So that is my year! Taking care, being thoughtful, doing things on purpose. Being intentional. Wish me luck :)

What do you want to accomplish in 2015? Do you make resolutions, and if you do, what did you resolve for this year?

xoxo Allison

Thursday, December 18, 2014

Holiday Magic: Winter Driving Emergency Kit

As we prepare to travel for the holidays, many of us are hopping in the car for hours at a time to visit family far and near. Winter driving in the north means crummy road conditions, bad visibility, and stressed out drivers. The potential for accidents is at an all time high and it is so important to be as prepared for the worst.


My dad always says "Always be ready to walk a mile." I'll never forget that! Even if you're just running to the store, be prepared! Dress properly, and be ready for an emergency! Up here in the great white north, walking for help (or to fill up your gas can!) from the scene of a breakdown can sometimes be much more than a mile, so it is really essential to have necessary supplies.

Since we now have an infant, all of this is even more important. When the weather started getting colder, I put together this emergency kit for our primary vehicle and it really puts my mind at ease. Here's what we included:

For the Us & Baby

Wipes & Diapers - However foolish, I have been known to run out for a quick errand without my diaper bag. These would definitely come in handy if we were stranded on the side of the road.

Extra Clothes, Hat & Mitts - God forbid we get wet in the case of an accident, or have to hike to safety, warm dry clothes are a must have.

Warm Blankets - Since it isn't safe for kids or babies to ride in the car in snow suits, these blankets will allow me to bundle her up if our car were to be wrecked or lose power.

Sleeping Bag - Keeping warm is essential in case of a winter emergency, and we can all snuggle up inside this cozy sleeping bag to help heat up.


Emergency Supplies

Coffee Can, Candles and Matches - Did you know you can heat your whole car with just this? In the case of an accident, you don't want to run your gas tank down just to heat the car. Check out this link for more detailed instructions.

Snacks - You never know how long you may be waiting for help, and especially in the cold you don't want your body running low on calories. Try for something that doesn't go bad, that has both protein and carbs. Energy bars or trail mix are a good choice.

Water - This one is a no-brainer! I almost always have water with me in the car anyways but a couple extra bottles could help keep you alive in an emergency.

First Aid Kit - While we can't be prepared for every possible injury, being prepared to tend to some small wounds while we wait for help is definitely a good. Band aids, antibiotic ointment, gauze, medical tape, alcohol wipes, medical scissors, and pain medication are a few of the basic things in our kit.

Cell Phone Charger - If your cell phone is dead, you can't call for help! These lipstick chargers are perfect for an emergency. Charge it up and toss it in the bag with a USB charger for all family members' cell phones.

Cat Litter - The cheap, non-clumping variety is perfect for creating traction under slipping, sliding wheels. Sand is also good for this, but kitty litter is a little easier to come by.

Shovel - In Northern Michigan, we can get 8" of snow in an hour - I've seen it happen! If you need to dig your vehicle out, you're going to want a shovel.

Flash Light - Nighttime driving is even more dangerous in the winter, and an extra light source is a great thing to have on hand.

Jumper Cables - I firmly believe everyone should have these in their car at all times! Be prepared to jump a dead battery! If you don't know how to do it, and you have a drivers license, you should learn!

Windshield Scraper - Most Northerners will already have a car brush and scraper in their cars. This is your best friend in the winter! We have these great mitten scrapers which are awesome for keeping warm. 


Winter Driving Tips

Keep the Emergency Kit in the passenger compartment. Just in case the trunk is jammed, frozen, or crushed shut, at least the personal supplies (clothing, snacks, warmth supplies) should be accessible from the passenger compartment. That portion of our kit is in a bag under the center console.

Never let your gas tank get less than half full. You don't want to be running on E when you're in the middle of nowhere at 3*F. A tank of gas can buy you a few hours of heat which could save your life.

Buckle up, and strap in properly. Safety restraints are only good if used properly. Ensure that the seatbelt is fitted properly and buckled up. The shoulder strap goes across your shoulder, not under your arm! Children in car seats should be buckled as well as having their chest clip secured at armpit level. Children 2 and under should be in rear-facing car seats, installed correctly in the vehicle. Check out this awesome website for more info on getting everyone properly bucked up. 

In case of a crash or break down, stay with your vehicle.  Your best chance of being found or helped is staying with your car. Hiking out in a storm, especially at night, is incredibly dangerous. Stay put if at all possible. 

Dress properly no matter how short your trip will be. If you're wearing heels, bring your boots. Always wear a proper coat, mittens or gloves, a hat, and scarf. Dress for the weather! Another thing my dad always says - There is no wrong weather, only wrong clothing. Be prepared for anything!

Don't go anywhere without your cell phone. That is your lifeline! It could help you send your coordinates and be found if you run off the road, or call 911 from the scene of a crash or breakdown.

But DON'T TEXT AND DRIVE! I am guilty of this but we all know texting and driving is incredibly dangerous. No text, Instagram, or Facebook post is that important. Distracted drivers are just as, if not more dangerous than drunk drivers. It can wait - your life is more important than your likes.


While we shouldn't be paralyzed by the fear of a car crash, we should be prepared to deal with it if the situation should arise. I hope this helps you feel more prepared for winter driving! Be safe out there as you travel for the holidays. Thanks for checking in!

xo Allison

Monday, December 15, 2014

Recipe: Simple Sandwich Bread

Almost 2 years ago, Scott & I started making our own bread instead of buying loaves at the grocery store. Since then, I can count on one hand the loaves of bread we've bought at the store. It creeped me out that supposedly "fresh" bread can sit on the grocer's shelves for weeks without showing signs of mold or staleness. Most of the breads you find in stores contain preservatives, artificial colors, bleaching agents, and nutrient destroying additives.

The sandwich bread recipe we use is an egg-enriched, white bread recipe. I know, whole wheat is much healthier! We have tried dozens of recipes with varying amounts of whole wheat flour, but this white bread recipe is just so far superior! The egg makes it a really rich, chewy bread and it holds up really well to butter without crumbling or tearing. If you have a great wheat bread recipe, please share, but for now we'll stick with this :)


We love love love our breadmaker. We use it at least twice a week to make bread, pizza dough, rolls, or buns. If you don't have one, I absolutely recommend getting one! I see them at Goodwill and Salvation Army all the time for just a few dollars. Keep your eye out and you might be able to pick one up for a great deal.

The smell of fresh baked bread is wonderfully infectious and welcoming! Homemade bread is a great way to impress your holiday guests without a lot of time or effort. We got this recipe from our Bread Machine Cook Book by Jennie Shapter. Here's what you'll need for this simple sandwich bread:


Ingredients

Yeild: 1 Medium Loaf
1 egg + 1 yolk
Water (see method)
4 1/2 C unbleached white flour
2 teaspoons granulated sugar
1 1/2 teaspoons salt
2 tablespoons butter
1 teaspoon rapid-rise active dry yeast

Method

Put the eggs in a measuring cup and add water to make 1 1/3 cups. Lightly mix the eggs and water, and pour into the bread machine. Next, sprinkle the flour over the wet ingredients to cover evenly. Measure the sugar out into one corner of the bread maker, and the salt into the other. Cut the butter into cubes and add to the machine. Last, make a small well in the flour and add the yeast.


You can bake the bread in the bread maker by selecting the White Bread setting, but we like to bake ours in the oven in regular loaf pans. This seems like a silly distinction, but baking in loaf pans makes for a better shaped loaf for sandwiches or toast. The bread maker makes a taller, almost cube shaped loaf which doesn't work as well. If you want to bake in the oven like we do, select the dough setting. Close the lid, and walk away! Our dough setting takes 90 minutes.

When the dough is complete, remove from the bread maker immediately. Shape into a loaf on a floured surface, and lay into a greased bread pan. Cover the pan with a wet cloth and leave in a warm place to rise for about 1 hour, or until doubled in size. We usually set ours on the stove (while the oven preheats), or in the microwave.


Once the loaf is risen, make a slit about 1/2 inch deep across the top of the bread. Bake in a 350* oven for 25 minutes or until dark golden brown. Remove to a cooling rack to cool.


We just love this bread recipe! The smell is intoxicating and it makes really yummy toast and sandwiches. The inside is fluffy and moist, with a crunchy outer crust. It should be noted that homemade bread should be stored in a sealed, dry container ideally in the fridge. The lack of preservatives make it prone to mold if left out for too long, so be careful! We almost never have issues because, well, we eat this up so fast! 


I challenge you not to have a hot slice of this bread fresh from the oven... it is almost impossible! I hope your family enjoys this yummy bread. Merry Christmas, and thanks for checking in! 

xo Allison

Saturday, December 13, 2014

Holiday Magic: What My Baby is Getting for Christmas

This is our first Christmas as parents and we could not be more excited. The reflection of sparkling Christmas lights in Felicity's baby blues, her wonder at the Christmas tree, her joyful giggles at the music and decorations... It is truly the most wonderful time of the year!

But what do you get an infant for Christmas? Felicity can't exactly make us a list! She is growing and changing so fast, toys are quickly outpaced by her development. She doesn't care much for clothes yet of course, and most of the time she would rather play with the box! Not to mention that shopping with an infant is difficult to say the least- so this year, we purchased everything online. If the gift can't be purchased on Amazon.com, we aren't giving it!

Felicity is about 9 months old and she is really starting to take notice and interact with the world around her, so shopping for her was a ton of fun! After lots of research and thought, we decided on a few fun things for her. I hope this list helps you shop for your baby!


1. Push Walker

Felicity loves to stand up! Ever since she was 2 months old, all she wanted was to be held upright. She has been pulling up and cruising on the furniture for 2 or 3 months now, and walking is just around the corner, so we wanted to get something to help her out. There are so many walkers out there, all with different styles, not to mention new recommendations on what is and isn't good for development. Oy! I looked up some criteria for searching for a walker, and found this to be very helpful. After much deliberation we finally settled on this one. 


It's nice and heavy, with wide set wheels so she won't be able to easily pull it over onto herself. I love that it's made of non toxic wood and paint, so it is totally safe. Hape Toys has some really awesome stuff, be sure to check their toys out for your little! Its also so cute that it comes with a little set of blocks, making this two toys in one. I can already picture Felicity wheeling her teddy bears around in the cart :) I think she'll love it!


2. Bath Toys

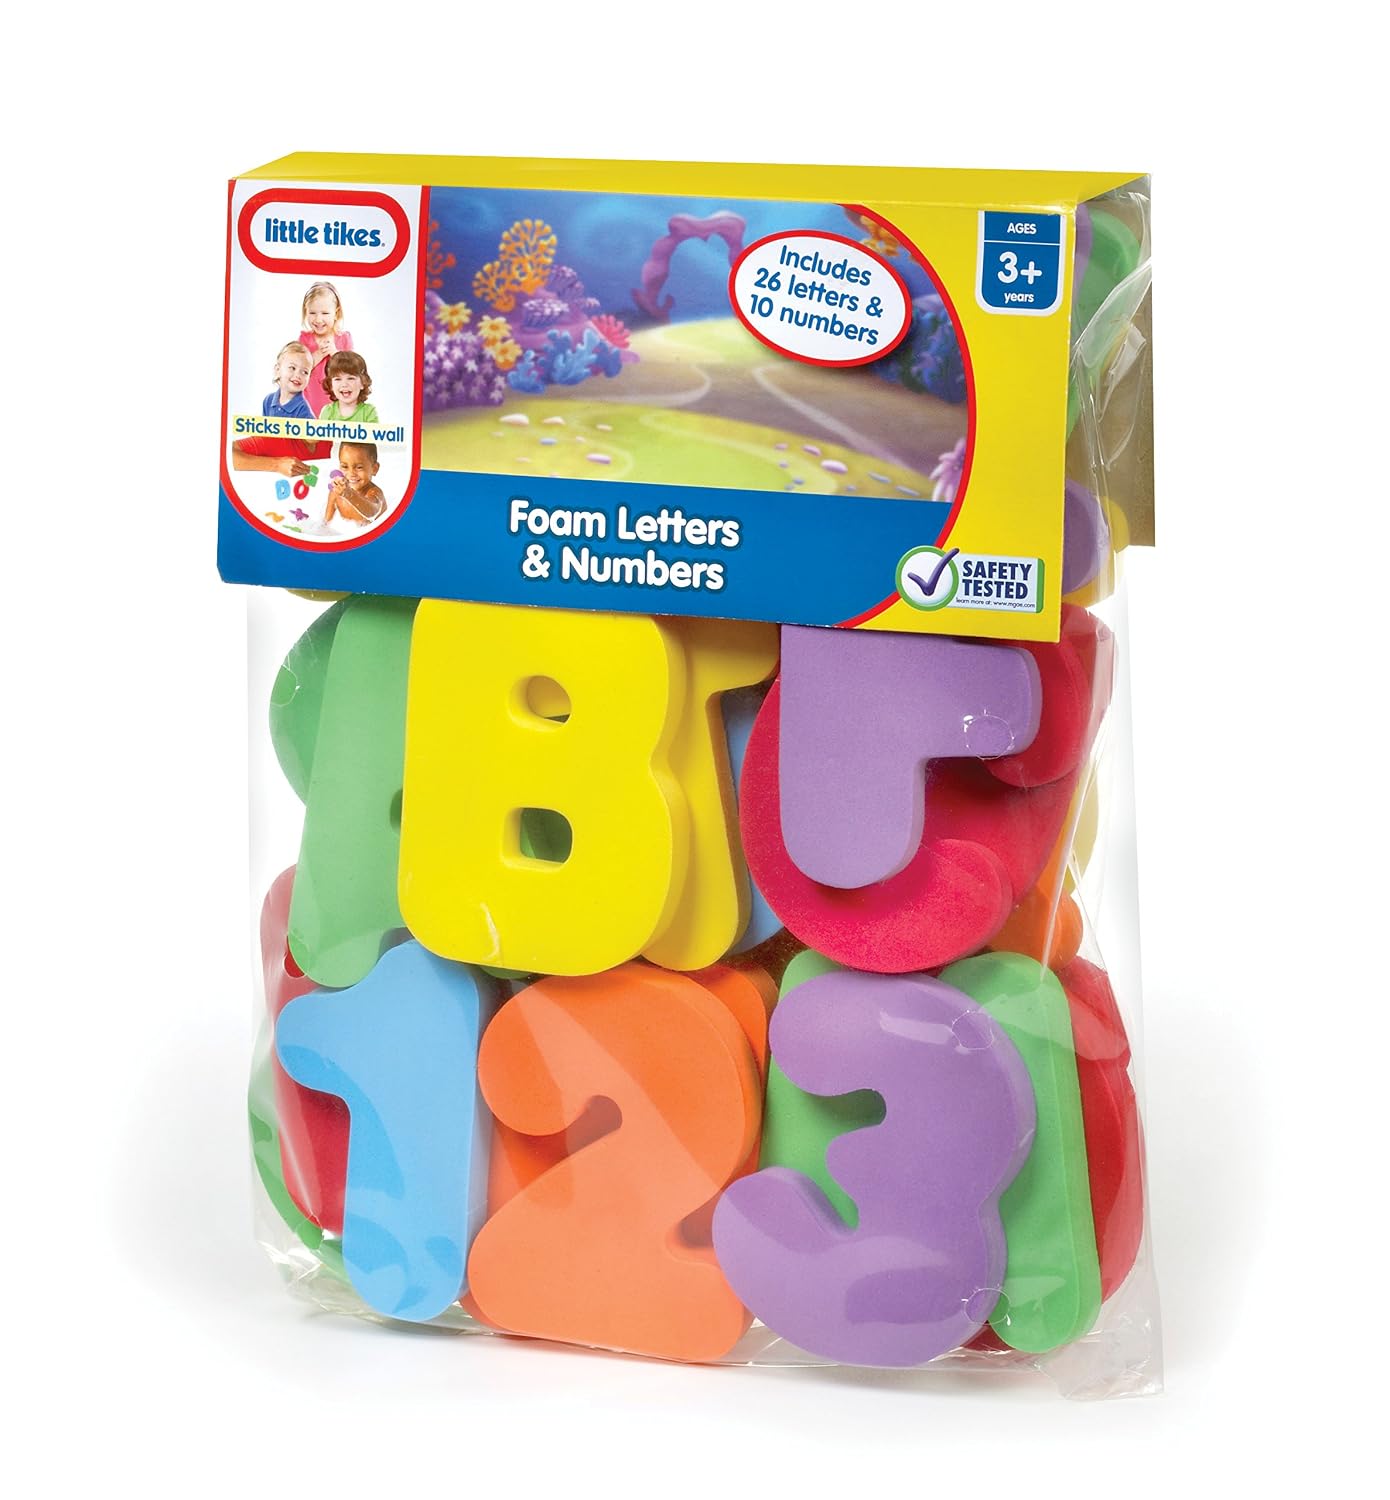
Much like her mama, Felicity is a total water baby. I once saw some parenting advice that read "if your baby is cranky, put her in water." This is so true! Nothing lifts a case of the crankies like a bath. Now that Felicity is sitting up well, she can play in the tub that much more, so it was time for some more toys! We already have a set of stacking cups and rubber duckies, so we purchased these letters and numbers for our collection.


Foamy and colorful, these are a classic. Great for chewing on or sticking to the shower walls now, and even better for teaching colors, letters and numbers later!

3. Activity Cube

When I started searching for what to get Felicity, my mommy friends unanimously recommended an activity cube. It is heavy and sturdy, definitely made to stand up to years of use.This is a great toy for kids from 6 months on upward- it will be many years before Felicity outgrows the fun of this toy! It has letters, numbers, animals, cars and trucks, and all sorts of other neat things for her to learn and play with. There are many many brands of Activity Cubes but we chose this Alex brand toy because it was so cute and really affordable. I think this will be a major hit :)

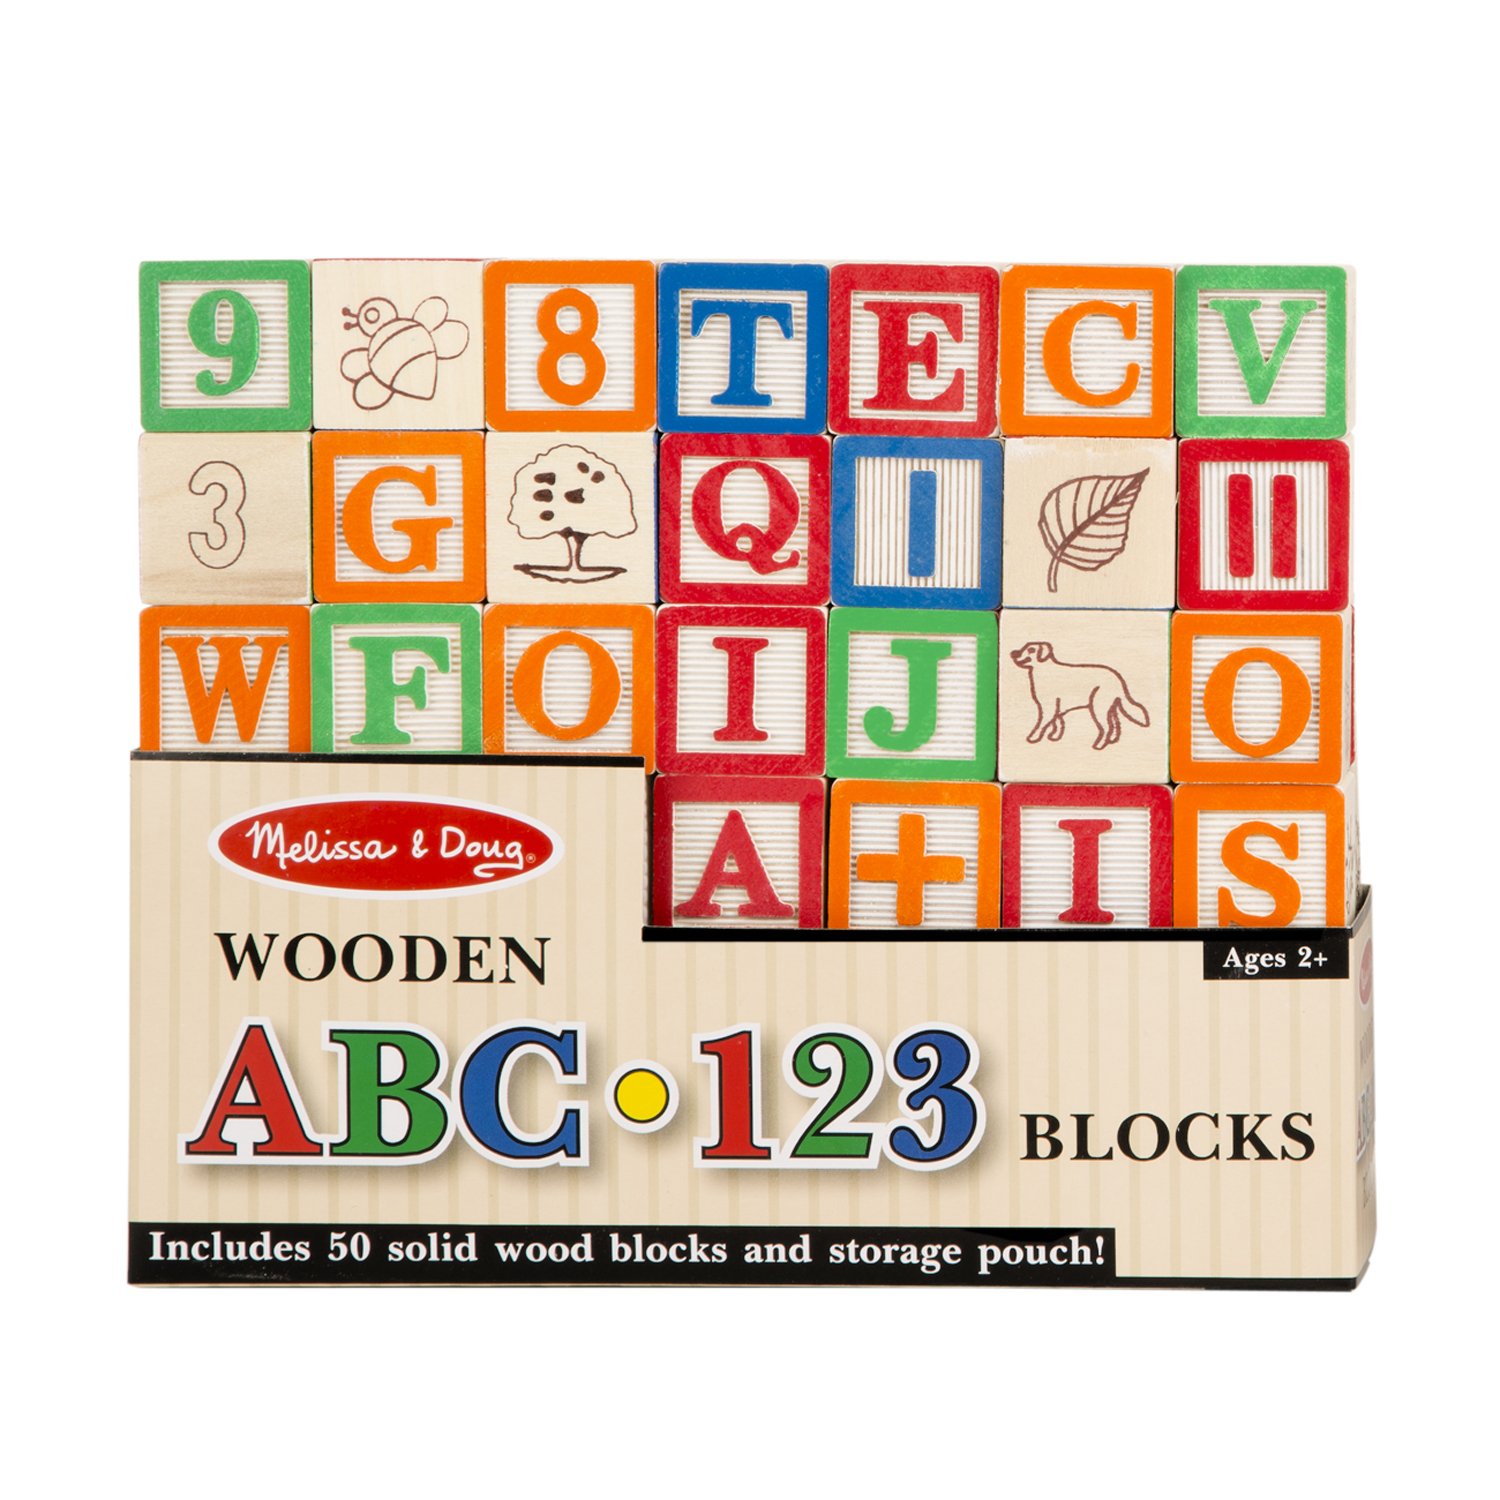
4. Wooden Blocks & Shape Sorter

Can you tell we love wooden toys? These Melissa & Doug classics belong in every kid's toy box. Bright colored and well made, I just couldn't pass them up. I love that the blocks come with a little bag too, so they are easily stored and kept together


5. Music Set

We just love music in our house! I am constantly singing to Felicity and playing music for her. She already loves to bang on whatever she can reach and "sing" along with the radio, so music toys were an absolute given.


I fell in love with this set from B Toys for a few reasons. First, the instruments are so cute and bright colored, and I just love that they're shaped like little critters! Second, they all fit inside the drum for easy storage.  Perfect! This toy will definitely grow with her as she learns more and more about music. 


That about covers what's under our tree! What about you? What did you find for your baby's first Christmas? What are you most excited about? I would love to hear from you in the comments below. Thanks for checking in!

xo Allison


Friday, November 21, 2014

Our Favorite Meatless Meals


A big part of this project for me is striving to eat healthier. Grass fed or organic meats aren't really in our budget right now, so reducing our meat consumption was the next best option. Frankly, most westerners eat way more meat than needed anyways! We try to eat at least 2 meatless dinners a week, and while they're still not 100% clean, I definitely feel better about eating fewer animal products. Here are some of our favorites.

Pasta Skillet


I found this recipe on Pinterest and it is one of our most favorite things to eat. Seriously, we probably have this at least once a week if not twice! Here's what you need - 

1 Tbsp olive oil
1 small onion
2 cloves garlic
1 (15 oz.) can diced tomatoes
½ tsp dried oregano
½ tsp dried basil
pinch red pepper flakes (optional)
freshly cracked pepper to taste
½ tsp salt
2 Tbsp tomato paste
½ cup water
2 oz. cream cheese
¼ cup grated Parmesan
½ lb. penne pasta, cooked
½ (9 oz.) bag fresh spinach

To prepare this meal, first saute the onion and garlic in olive oil until soft. Then, add in the spices and diced tomatoes and stir. Scoop in the tomato paste and water and whisk to combine. Next, the cream cheese and Parmesean go in, while you continue to whisk until they melt into the sauce. Toss in the pasta and spinach, stir until the spinach is wilted... and serve! 
This is the most fabulously delicious meal, you will want to make it up again the next night!
~~~~~~~~~~~~

Stir Fry

This is an easy one. Chop up veggies you enjoy, toss in a wok or large fry pan with a little oil, garlic, and soy sauce, and voila, dinner is served. Our favorite stir fry veggies are red and yellow peppers, broccoli, red onion, and snap or snow peas. Pair with a little brown rice or asian style noodles if you need a little more substance. 
~~~~~~~~~~~~

Cilantro Lime Rice & Bean Burritos

We first tried this meal out when I was on a vegan kick. We wanted something really filling and hearty but of course it had to be free from animal products. These definitely fit the bill! Here's what you'll need - 

1 can black beans or pre-soaked dried black beans
½ white onion, chopped
2 tsp. fresh cilantro
2/3 cup white basmati rice
1 cup water
½ teaspoon salt
1 lime
Salsa, hot sauce, and other desired burrito ingredients
Tortillas

For the beans, combine with onion and cook according to package directions or until onions are soft. The cilantro lime rice is super simple as well, just cook the rice according to package directions, adding the juice of the lime in with the water. Once the rice is cooked, remove from heat and stir in the cilantro. 
Layer the beans and rice into your burritos with salsa and anything else you like. We usually use some cheese (obviously not vegan!) and Scott loves siracha on his too. 
~~~~~~~~~~~~

Avocado Corn Salsa

Sometimes, we just want a meal we can enjoy while sitting on the couch or out on the back porch. This is more of a summer meal, but it is really filling and easy to customize to your tastes. Here's what you'll need:

1 can sweet corn
1 can black beans, rinsed
2 large tomatoes
1 red onion
2 avocados
1 lime
1/4 cup cilantro, roughly chopped
Kosher salt to taste

Give the onion a rough chop, and cube the tomato before combining all ingredients in a large bowl. Toss to combine, and dig in! We usually just eat this with tortilla chips. Ok, ok, this isn't a mean necessarily but it has protein, good fats, veggies, and it is really filling... if you eat a lot of it like we do :)

~~~~~~~~~~~~

Spinach Lasagna Rolls


I just love Skinnytaste for lean but yummy recipes. These lasagna rolls are totally delish, they freeze great for make-ahead type cooking, and somehow they are even better warmed up the next day as leftovers! The original recipe recommends the use of low fat cheeses but I'm not about that- I'd rather have real fat than the yucky chemicals they use to flavor the food in place of fat. Anyways... here's what you'll need - 

9 lasagna noodles, cooked
10 oz frozen chopped spinach, thawed and completely drained
15 oz ricotta cheese
1/2 cup grated Parmesan cheese
1 egg
salt and fresh pepper
32 oz tomato sauce
9 tbsp shredded mozzarella cheese

Combine the ricotta and parmesan with egg, salt and pepper, and spinach. Spread 1/4 cup onto each lasagna noodle then roll up. Spread a little pasta sauce over the bottom of a 9"x13" pan and then lay each lasagna roll into the pan. Cover the rolls with the remaining sauce and sprinkle a tablespoon of shredded mozarella onto each roll. Cover the pan with foil, and bake the rolls at 350* for 40 minutes. Remove the foil and bake for 10 more minutes until the cheese is melted.

~~~~~~~~~~~~

With the holidays coming, I think we could all use some lighter meals! I hope you enjoy some of these yummy meatless meals with your family. :) Thanks for reading!

xo Allison